Objectives
Configure load balancer to accept HTTPS traffic.
Create a self-signed certificate
In this step we will create a self-signed certificate to attach to an elastic load balancer in AWS.
Using a self-signed certificate will allow us to secure traffic between browser and load balancer, but the browser will provide a warning that the certificate is untrusted as there is potential for a meet-in-the-middle attack. Resolving this is beyond the scope of this module -- it requires you to register a domain name and prove domain ownership to a trusted root CA such as Let's Encrypt.
Firstly, create the load balancer in AWS and have it accept HTTP traffic only for now.
In Step 3, specify a security group that accepts HTTPS traffic (port 443) as well as HTTP (port 80) from anywhere.
When you are finished, note the DNS name assigned to the load balancer.
As we did in the TLS lab in the EWD module a few weeks ago, we create a 2048-bit RSA private key for the CA
openssl genrsa -out webserver.key 2048Now use this to create a certificate signing request for the web server, but this time enter your load balancer's DNS name when asked for the Common Name (FQDN); e.g.
Country Name (2 letter code) [AU]:IEopenssl req -new -key webserver.key -out webserver.csr
State or Province Name (full name) [Some-State]:.
Locality Name (eg, city) []:Waterford
Organization Name (eg, company) [Internet Widgits Pty Ltd]:Reliable web apps
Organizational Unit Name (eg, section) []:.
Common Name (e.g. server FQDN or YOUR name) []:test-lb-52894102.eu-west-1.elb.amazonaws.com
Email Address []:
Please enter the following 'extra' attributes
to be sent with your certificate request
A challenge password []:
An optional company name []:
Next, create a new self-signed certificate based on this new CSR file:
openssl x509 -req -signkey webserver.key -sha256 -in webserver.csr -out webserver_self.crt
Import your certificate into AWS Certificate Manager
In the AWS Web Management Console, select Services and Certificate Manager (in the Security category).
Click Get Started under Provision Certificates
Next choose Import a Certificate.
Paste in your Certificate body (webserver_self.crt) and Certificate private Key (webserver.key). You can leave the Certificate chain blank.
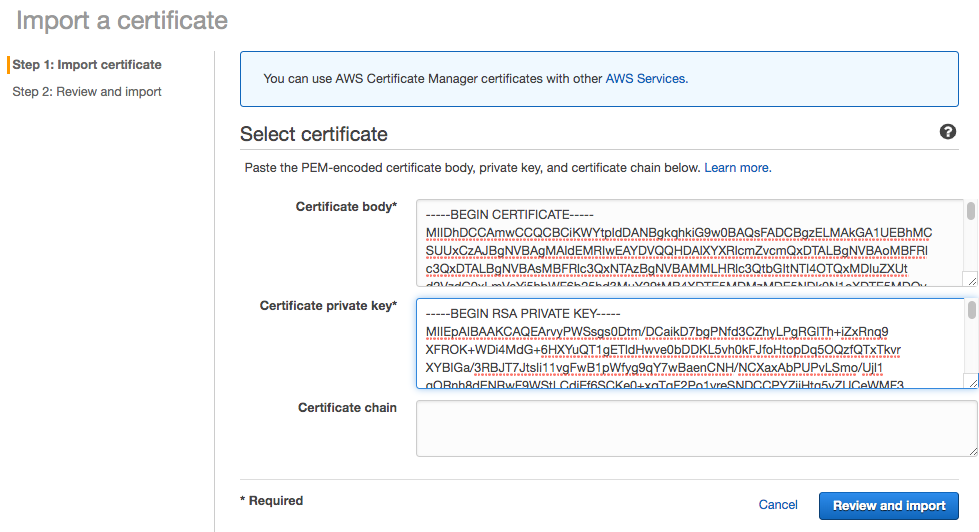
Now Review and Import and confirm on the next page.
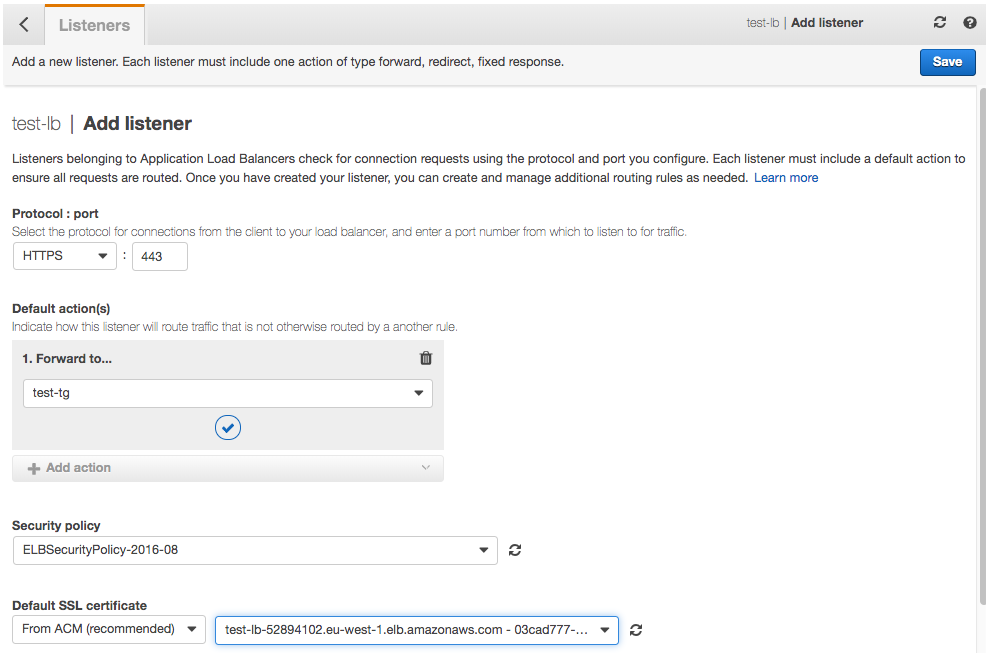
Create a HTTPS listener for your LB
Go back to EC2, select Load Balancers and your recently-created load balancer.
Click on the Listeners tab and Add Listener
Choose HTTPS (port 443).
Under Default action(s), add an Action to Forward to your target group
Leave the Security policy setting unchanged
For Default SSL certificate, select your newly-created certificate from AWS Certificate Manager (ACM)
Click Save
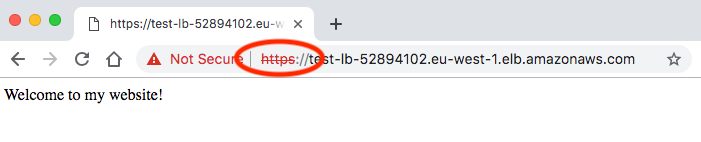
You should now be able to browse to https://your-loadbalancer-dns-name/ (You will get a browser warning as the certificate is self-signed.)
You may wish to inspect the certificate presented by the load balancer.